Creating multiple documents
You are able to create multiple documents with different names based on variables used in the model. This tutorial will explain how you can do so. We will use a model with a repeat. We also recommend understanding the basics of document assembly. If you haven’t yet read the explanation on repeating, we recommend you to do so first.
The model
The model used for this tutorial looks like the picture below. The introduction node provides an introduction, the information node contains a repeat, a graph over which to repeat, and a question which asks how many times one has to go through the graph. The result node contains a closing text.

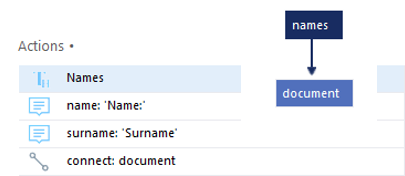
Within the sub graph ‘gnames‘ which is repeated, there are two nodes, one named names and one named document. The names node contains two questions, ‘name’ and ‘surname’, which asks the user for their name and surname. These are the variables that will be used to add to the document name (see picture below).
Preparing the document node
The document node is the most important node in this feature.
In this node, we will retrieve all variables that we want to use in the document name and create the document itself.
Now, create a text fragment in which you place the variables asked in the names node.
Then, to make use of these variables, you will have to retrieve them from the previous node.
In this example, add a formula called ‘name’ and set the formula to names.name.
Do the same for the surname. You should have something as follows in the Actions panel.

Adding the document
Now, add a document.
This is explained on this documentation page.
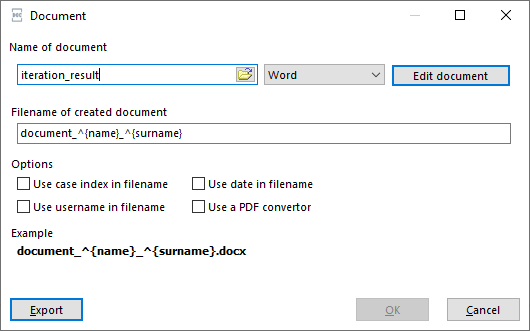
To add a variable to the filename, simply use the caret symbol ‘^’ before the variable name.
If you have multiple variables that you want to use, it is necessary to put the variables between accolades ‘{ }’.
In the case of this example, the filename of the created documents should be: ‘document_of_name_surname.
To get this, enter the following as the filename: document\_of\_^{name}_^{surname}.
 Now, press
 [OK], save the model and you are able to run it.
To view the documents created, you will have to go to the document folder at the location where you saved the model.